A single analyst running a Cortex LLM function across a billion-row table can burn through a week of compute credits in an afternoon. Until now, Snowflake gave you budget alerts that fired after the money was gone, and account-level anomaly detection that flagged a spike for the whole organization without telling you which team caused it. Release 10.29 changes the toolkit. Per-user quotas are now generally available, letting quota admins set daily and monthly credit limits per user with automatic block enforcement, tag-filtered scoping, and separate tracking for warehouse compute and AI domains. Alongside that, anomaly monitors enter public preview, letting you carve out team or project scopes for spike detection instead of relying on org-wide noise. Together they give FinOps owners something Snowflake has lacked: a hard ceiling on individual spend, not just a post-mortem alert.
What can a per-user quota actually limit?
A quota targets one of two credit domains: warehouse compute or AI features. A single quota cannot mix the two, which means you need separate quotas if you want to govern both. The AI domain covers AI Functions, Snowflake CoCo, Cortex Agents, and Snowflake CoWork. The warehouse domain covers standard compute credits from running warehouses.
Every user in scope gets the same monthly or daily limit. The quota does not support per-user custom amounts within a single quota object. If you need different limits for different groups, you create multiple quotas and use tags to scope each one.
The core SQL surface lives in the per-user quotas documentation, where Snowflake describes the class methods for creating and managing quotas. Here is the shape of creating a quota with SQL:
-- Create a monthly quota of 500 credits per user for warehouse compute
CALL QUOTA_ADMIN.CREATE_QUOTA(
  'warehouse_team_quota',
  'Monthly warehouse compute limit per user',
  'WAREHOUSE_COMPUTE',
  500,  -- monthly credit limit
  NULL,  -- no daily limit
  'MONTHLY'
);
You can set both a monthly and a daily limit on the same quota. The daily limit acts as a shorter fuse: a user hitting 50 credits in a single day gets blocked even if their monthly cap of 500 is untouched.
How do you scope a quota to specific teams?
By default, a new quota monitors all users in the account with zero configuration. That is the simplest path, and any user added later is automatically included. But the real value is tag-based scoping, which lets you apply different credit ceilings to different teams, cost centers, or business units.
Snowflake tags function as key-value pairs where each key supports a single value per user. You use the SET_USER_TAGS method to assign tags, and the call is atomic and idempotent: existing tags are overwritten. User resolution happens dynamically at evaluation time, so retagging a user flows into the quota without reconfiguration.
When multiple tag keys are involved, you choose a matching operator:
| Scoping mode | Operator | Behavior |
|---|---|---|
| Default | UNION |
Any user matching at least one tag key is in scope |
| Restrictive | INTERSECTION |
User must match every specified tag key to be in scope |
| Account-wide | None | All users in the account, including future additions |
Here is how you scope a quota to a tag-filtered subset:
-- Assign a tag to a user
CALL QUOTA_ADMIN.SET_USER_TAGS(
  'analyst_jane',
  OBJECT_CONSTRUCT('cost_center', 'finance')
);

-- Create a quota scoped to the finance cost center
CALL QUOTA_ADMIN.CREATE_QUOTA(
  'finance_ai_quota',
  'AI credit limit for finance team',
  'AI_COMPUTE',
  200,  -- monthly limit
  30,   -- daily limit
  'MONTHLY'
);

-- Scope the quota to users tagged with cost_center = finance
CALL QUOTA_ADMIN.SET_USER_TAGS_SCOPE(
  'finance_ai_quota',
  ARRAY_CONSTRUCT(OBJECT_CONSTRUCT('cost_center', 'finance')),
  'INTERSECTION'
);
The INTERSECTION operator is what you want when you need precision. If you tag users by both cost_center and team, an intersection requires both keys to match, so you can target exactly the data science pod inside finance without sweeping in the BI team.
How does block enforcement work in practice?
This is the feature that separates quotas from budgets. A budget notifies you when spend crosses a threshold. A quota with block enforcement automatically blocks the user from incurring further credits in the governed domain when they hit their limit. The block releases when the cycle resets, or when an admin raises the limit.
At GA, block enforcement gained a second boolean argument for email notifications. The call SET_BLOCK_ENFORCEMENT_ENABLED(TRUE, TRUE) enables enforcement and sends an email to the blocked user. With SET_BLOCK_ENFORCEMENT_ENABLED(TRUE, FALSE), the user is blocked silently. End-user notifications are disabled by default at GA, so admins must explicitly opt in.
Notification thresholds are now scoped to monthly or daily limits. You pass 'MONTHLY' or 'DAILY' as the fourth argument to ADD_NOTIFICATION_THRESHOLD, which means you can get a heads-up at 80 percent of the daily cap without conflating it with the monthly ceiling.
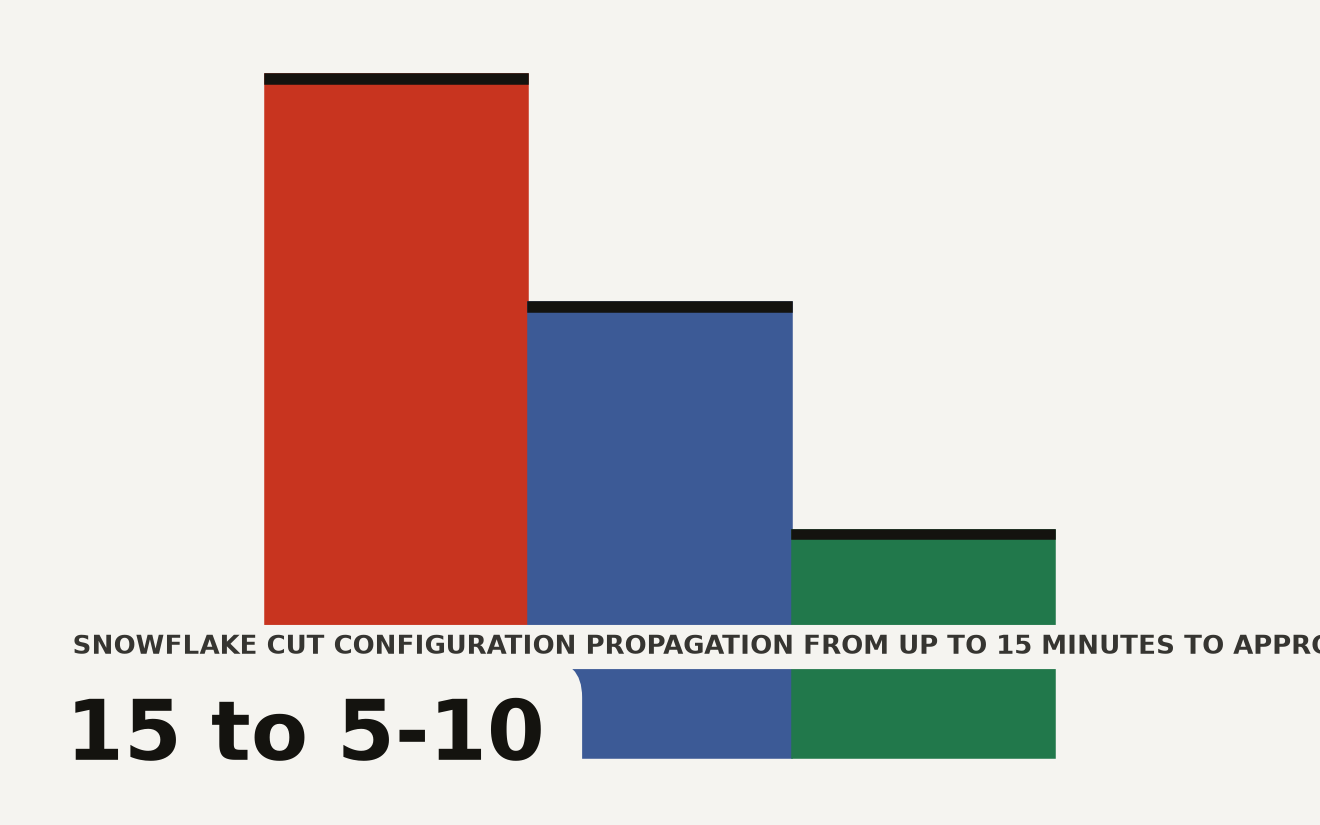
Quota evaluation is not real time. Snowflake states that evaluation occurs within minutes, and configuration changes now propagate in approximately 5 to 10 minutes, down from up to 15 minutes in the preview. There may be a slight lag between a user being blocked and the data appearing in Snowsight.
The new ACCOUNT_USAGE.QUOTA_ACCESS_BLOCK_HISTORY view shows every blocked user across all quotas in the account. Query it to audit enforcement:
SELECT
  user_name,
  quota_name,
  block_reason,
  blocked_at,
  released_at
FROM SNOWFLAKE.ACCOUNT_USAGE.QUOTA_ACCESS_BLOCK_HISTORY
WHERE blocked_at >= DATEADD('day', -7, CURRENT_TIMESTAMP())
ORDER BY blocked_at DESC;
Several preview methods were replaced or removed at GA. GET_ACTIVE_BLOCKS() is now GET_ACTIVE_BLOCKS_V2(). GET_PER_USER_USAGE_PREVIEW() and SET_REFRESH_TIER() are gone entirely, since evaluation speed is now uniform across accounts.
What does the anomaly monitor preview add on top?
Per-user quotas are a ceiling. Anomaly monitors are a smoke detector. They entered public preview in the same 10.29 release, and they solve a problem the old account-level anomaly detection could not: spotting a spike inside a single team or project before it dominates the bill.
You can create up to 20 monitors per account, and each monitor tracks either credits or AI credits. The scope is defined by object tags and service types, so you can monitor a business unit, cost center, or project in isolation. Snowflake attributes consumption to each monitor daily and runs its detection algorithm against that scoped consumption. Each monitor has its own email notification list.
The ANOMALY_INSIGHTS class provides SQL methods to create, update, read, and delete monitors, manage notification lists, and test a configuration without saving it. In Snowsight, the Anomalies tab in Cost Management now lets you select a monitor, choose a credit family, build a scope from tags and service types, and review the anomalies the scope produces before committing.
One detail worth noting: if you retag resources after a monitor is saved, you can recalculate the monitor to pick up the new scope. Tags are not frozen at creation time.
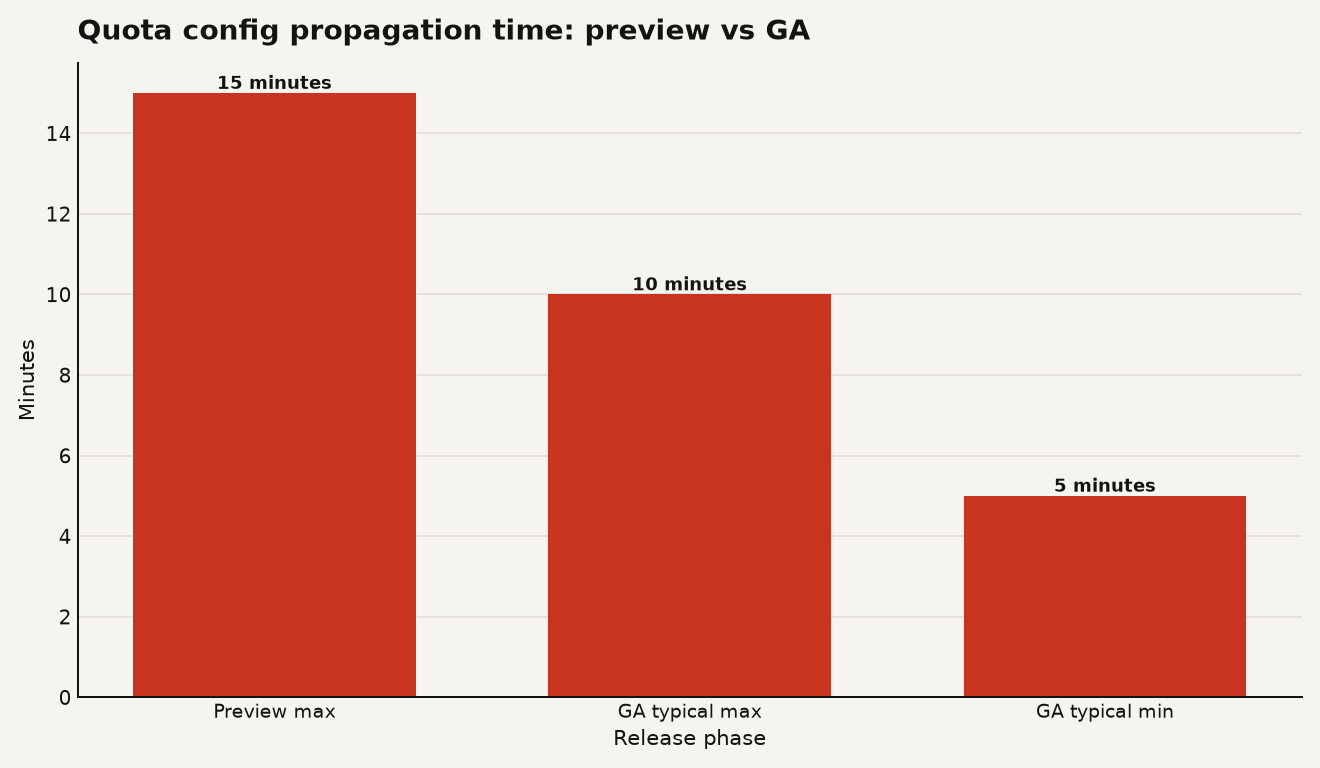
The chart above shows the enforcement propagation improvement at GA, dropping from a preview ceiling of 15 minutes to the current 5 to 10 minute window. Faster propagation means less credit exposure between a threshold crossing and a block taking effect.
What will this cost you, and what will it not catch?
There is no additional credit charge for creating quotas or anomaly monitors. The cost is operational: the time to design your tagging strategy, set up scopes, tune thresholds, and handle the support tickets when someone gets blocked mid-pipeline.
The gaps to plan around:
- Evaluation lag. Quota evaluation runs within minutes, not seconds. A user running an expensive AI function can overshoot their limit before the block fires. Budget for overshoot.
- One domain per quota. You cannot mix warehouse and AI credits in a single quota. Governing both means two quota objects per scope.
- Uniform limits. Every user in a quota scope gets the same ceiling. If one power user needs a higher limit, that user needs a different quota with a different tag scope.
- Anomaly monitors are preview. Do not build a production incident pipeline that depends on them without a fallback. Preview features can change behavior before GA.
- No cross-account quotas. Quotas are account-scoped. If you run a multi-account setup, you need quotas in each account.
What should you roll out first?
Start with a single AI-domain quota scoped to all users at a conservative monthly limit. AI credits are the most volatile line item right now, and a single runaway Cortex function call can dwarf warehouse spend. Set the limit high enough that normal usage never touches it, then tighten over a few billing cycles as you learn the baseline. Enable block enforcement but leave end-user email notifications off initially, so you control the messaging rather than surprising people with automated emails.
Add the QUOTA_ACCESS_BLOCK_HISTORY query to your weekly FinOps review from day one. The first few blocks will tell you whether your limits are calibrated or need adjustment.
For anomaly monitors, pick one business unit with a clean tagging strategy and pilot it there. The value is in scoping, so if your object tags are inconsistent or missing, fix that first. A monitor built on bad tags produces bad anomalies.
If you are already thinking about broader warehouse cost governance, the bill owner playbook for Adaptive Compute covers how to size warehouses to minimize idle spend, which complements the per-user ceiling that quotas provide. Quotas cap what a person can burn. Warehouse sizing caps how efficiently they burn it.
The combination of per-user quotas and anomaly monitors does not replace good warehouse sizing or pipeline design. What it does is close the last gap in Snowflake cost governance: the ability to say, with a hard enforcement mechanism, that no single user can spend more than X credits in a given window. For teams rolling out Cortex features to a broad internal audience, that is the difference between a controlled rollout and an open mic on the company credit card.